Tuesday, 17 December 2013

Lizarmen: TEMPLE GUARD 1/36

Hello my friends,

in the last post I showed how can you paint the basic coat to lizardmen with an airbrush. Well today I'll show my first ended temple guard.

I'll not explain all the process you can se it how I did watiching the pictures.

Basically, higlight with temple guard blue addiing white, the scales with enchanted blue adding white, the gold like de Skink Priest ;), bone and nails bleached bone, shadow with agrax earth shade and highlighted with bleached adding white.

I hope you will enjoy it:


To decorate the base I've used stones like the Slann stones and GW sand:


The first look of the unit! Still 35 on queue to be painted =)


Soon more updates!!

see ya!

Tuesday, 3 December 2013

HOW CAN I: Paint the basic coats of lizardmen with an airbrush?

Hello fellas,

on this post I'll start the section: "HOW CAN I...?"

This post is about HOW CAN I Paint the basic coats of lizardmen with an airbrush??

Basically I'll paint it in three steps:
· White priming
· Paint the darker colour
· Paint the clear colour

I pretend to paint the two basic layers of a lizardmen, and basically they have two colors.

Why do I paint in this order? because in small models (I'm used to ogre models) we can not mask the areas that we don't want to paint, probably we'll mess the area that we don't want paint and it's easier to darken than clear.

I allways paint in pieces, it's easier to reach all places of the miniature in this way.

1.- White priming


2.- Dark colour coat:  In this case dark blue from Vallejo, this will be the color of the scales, the base color, over this coat I'll put layers in every scale to highlight.


3.- Paint the skin with the clear base as we want, we have to paint directly with the clear colour and where we want we have to do more emphasis with airbrush to reach the clearness that we are looking for, they will be our firsts highlights. Basically we'll paint until have a clear area over the chest and near the scales. We'll not concentrate a lot of paint in the areae near the scales because we are trying to reach a degraded.


Those skinks are well and easy painted because the paint used on they are airbrush paint, it has the texture and the appropriate viscosity for an airbrush, with this kind of paint we can control the flux of paint than we throw over the miniature.

I've painted it and I paint all my miniatures using a presure of 15/20 PSI, no more than that! if we put more presure the paint will go out will a lot of force and we'll mess it up, and less pressure implies that the airbrush will spit the paint and we'll mess it up too.

Now I'm going to show you what I'm painting right now. The preparation of the models and all the process of the airbrush base coating.

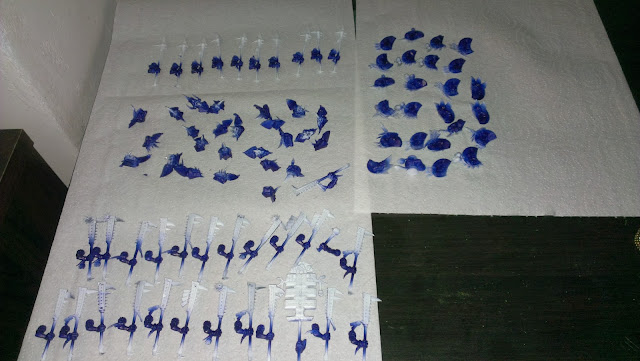
1.- Model preparation, all of them separated in pieces, I have 4 types of pieces, the bodies, the right arms (weapon arm), the left arms (shield arm) and the heads.


2.- I've painted the white primer and the first coat of dark blue over the models.


3.- In this case I have a problem and I ask myself the following question: "May I use Citadel base paint on my airbrush?"... well the answer is... yes you can but is better not do that. The Citadel base paint is like a foundation and it's very thick and it may obstruct airbrush.


I wanted to paint the skin of the temple guard with Citadel temple guard blue and it implies to use this class of paint in my airbrush... so, how can I paint it without breaking the airbrush? Easy, I have to thin the paint, I've used Vallejo thinner, you have to mix the thinner and the paint until you have a mixture like milk, then, only then you can use it on the airbrush and paint the models.


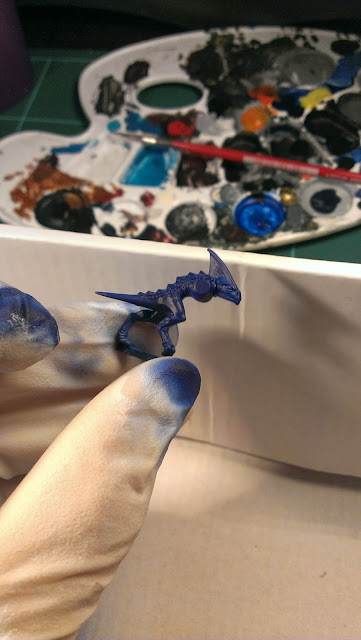
Due to the paint is more fluid than origin Citadel paint, we cannot bring closer the airbrush to the model and paint, because we'll mess all the work done, we have to paint  at a prudential distance messing the previous work with the dark colour, you can see what am I saying on this picture.


As you can see, I crosed the dark line of the tail, but it has an easy solution, we have to go over the errors with a brush and correct the scales using the dark color.


This is the result, I like it very much, is a perfect base to paint an excellent unit like the temple guard, I have the two basic colors of the unit and I saved a lot of time applying them, we can assert that I spent 5 hours, preparing the models, priming them and applying with this two colors on the heads, arms and bodies.

36 Bodies + 36 Right arms + 26 Left Arms + 26 Heads = 124 pieces primed and two base colored.

Time spent on every piece: 300 minutes / 124 pieces = 2' 25" average for each piece, taking account that you spent more time in a body than an arm or a head.

Is it worth? Yes, I have no doubt about it, the result is more clean than a current brush.

Thank you very much! and I hope you like this HOW CAN I...?

See you on the next post, with skink priest pictures.

Monday, 25 November 2013

Lizarmen: SKINK PRIEST I

Hello fellas,

I'm going to show you the novelty I'm painting right now. I'm changing my paint target because if I don't do I'll go crazy.

The model is the skink priest of GW. I love this miniature I think that is the most spectacular model of the lizarmen colletion.

I've painted it totally assembled because I didn't want any post-painted glue mark or something that.

I've undercoated it with skull white with my airbrush, and then all of it painted with normal brush (back to basics on a small model) . Base of temple guard blue, shadowed with a blue ink, and then highlighted with temple guard blue, and adding white to the mixture for the top lights of the model, always with glaze, it means very diluted paint.

In the two first pictures you can see the scales too, painted in base color with scab red.


The next step had been paint brown everything that goes into old gold. After paint it in brown I've painted it with dwarf bronze.


I've added agrax earth shade to the bronze.


Drybrush with boltgun metal, and outlined with mithril silver


I've painted the pens following the GW schema, from orange to green.


I've painted the finger nails and toe nails and the skull on the crook withe bleaches bone, the rubies from black to red and the eyes.


In the next post I'll show you the model ended with one base conrding to the level of the minuature.

I'll post the normal skinks and the skirmishers too.

Thanks for reading, see you soon!

Tuesday, 19 November 2013

Lizarmen: SKINKS II Movement tray for the skirmishers

Hello fellas! 

Today I'm showing to you my movement tray project for my skirmisher skinks. 

I've did it with three rows, I know the skirmirshers are on two rows not in three, but is an scenic movement tray and I think my opponents will not be diturbed if I play with it.

I've used the GW movement tray, and clay on the border to create the surface that I was looking for.

Then I added sand, stones and I digged the base to recreate the river and holes to put inside the trees. I'm trying to recreate the jungle aspect and I'm close enough.

For the trees I've used aquarium plants, cutted at the size I needed, you can find these plants on your nearest pet shop. 

The plants are something like that: AQUARIUM PLANTS

Well the pictures of the movement tray, I'm proud of it:


In this following pictures you can see white paste, it's the water effects of vallejo that I've presented to you in older posts:


When it dries, it has volume and transparency:


I hope you like it. Next post, ended skinks and ended skirmisher skinks.

Thank you for following me! see you soon!

Monday, 18 November 2013

Lizarmen: SLANN III finished

Good morning people!

I've ended the Slann, you can see the base. I've undercoated with black and then dry brush of grey adding white to mixture for the next layers. Then I've painted with nuln oil ink to create the shadows and hightlited again with a very light drybrush of codez grey. 

When everything was dry I've added the grass (yellow and green grass), I've added sand too painted with brown colors and highlighted with bleached bone and the moss to the base and "voilĂ " and ended Slann base.


Only rest one thing, add the Slann and varnish all the model with vallejo model air mat varnish. Here you are the pictures of ended Slann.

Yes, there is a carrot behind the Slann and no, this is not a part of the model ;)


I hope you like it, this week I'll show you ended skinks and the movement tray for the skirmish skins that I'm preparing at this moment. 

See you soon folks! 

Friday, 15 November 2013

Lizarmen: SLANN II

Hello people!

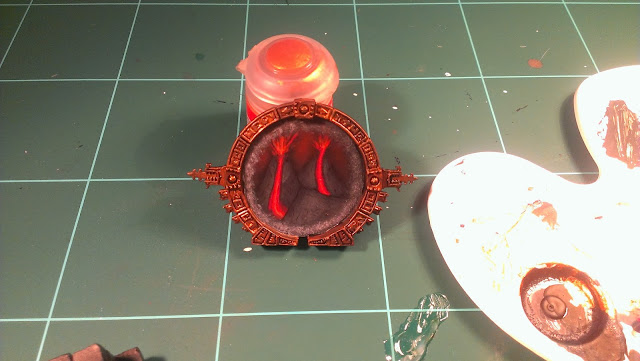
More updates on Slann, well on the base, I've made a stone throne with stargate behind the wizard, using the ancestral parts of stegadon.

Well an image is better than words, isn't it?


I've used modelling stones glued with Loctite. I've put two columns at both sides of the throne and I'll put something  about lizarmen.


I¡ve painted the portal with freehand, I think that it's acceptable, I like it and I think that will be a precious center piece of my army.

Well, see you soon! On the next post, the Slann will be ended.

Wednesday, 13 November 2013

Lizarmen: SLANN I

Hello fellas!

I know I told you that I was going to post the end of the Skink unit, but Slann come to my hands and I couldn't resist the temptation to paint it, hahaha!

This miniature will be the central piece of m army, so my intention is to paint it the best I can and I hope that it will be enough ;)

First of all, I've removed the burrs on the model, it's a metal model, so I used a modeling scalpel carefully because it's dangerous and it cuts a lot.

After that, I've primed the model with withe primer for airbrush (Vallejo primer premium or something like that). Then I applied the first layer of blue, dark blue, and after that always with airbrush, I applied the following layers adding withe to the mixture as far as you want the top light of the model.


After that, I clean the table and the airbrush and I've started to paint the details, the gold, some more lights on the face to create more contrast with the shadows.


I've painted de pustules and the pimples like that, like something disgusting, he is an ancient wizard, he doesn't care about his aspect. I've added some dark color to the shadows.


Well that's all, on the next post I'll show you the model ended and the base, I have an idea and I hope you will like it.

See you soon!